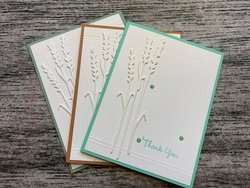

My first sample was made with three die cuts in Basic White, precisely glued together with Tombo Multipurpose glue. The score marks were made on the backside of the Basic White panel (4″ x 5-1/4″) using the score tool on my paper trimmer, at 3/8″ and 1/2″.

The second sample was made using three die cuts again, but I had layered adhesive sheets to the back of my basic White card stock before I ran the dies through my Stampin’ Cut & Emboss machine. The detail on these samples is done by applying a light layer of coordinating ink over a stencil sheet with a blending brush.
The third sample in my Youtube tutorial was made using the adhesive foam sheets, on the back of your Basic White card stock, and cutting out one die cut. Then peel off the backing and adhere to the front of your card, after you emboss with your score tools, and stamping your sentiment. On all cards, embellish with ribbon and gems of your choice.

This sample was made using three cut outs from the deer punch, available in the July-December 2021 holiday mini catalogue, then placing it over an iridescent snowflake. On this card, I used gold heat emboss powder for the sentiment, which you want to do before you apply any of the other elements
Please check out my YouTube tutorial


Leave a Reply